QUALITY vs QUALITY
The Z-Craft Roofing Field Guide
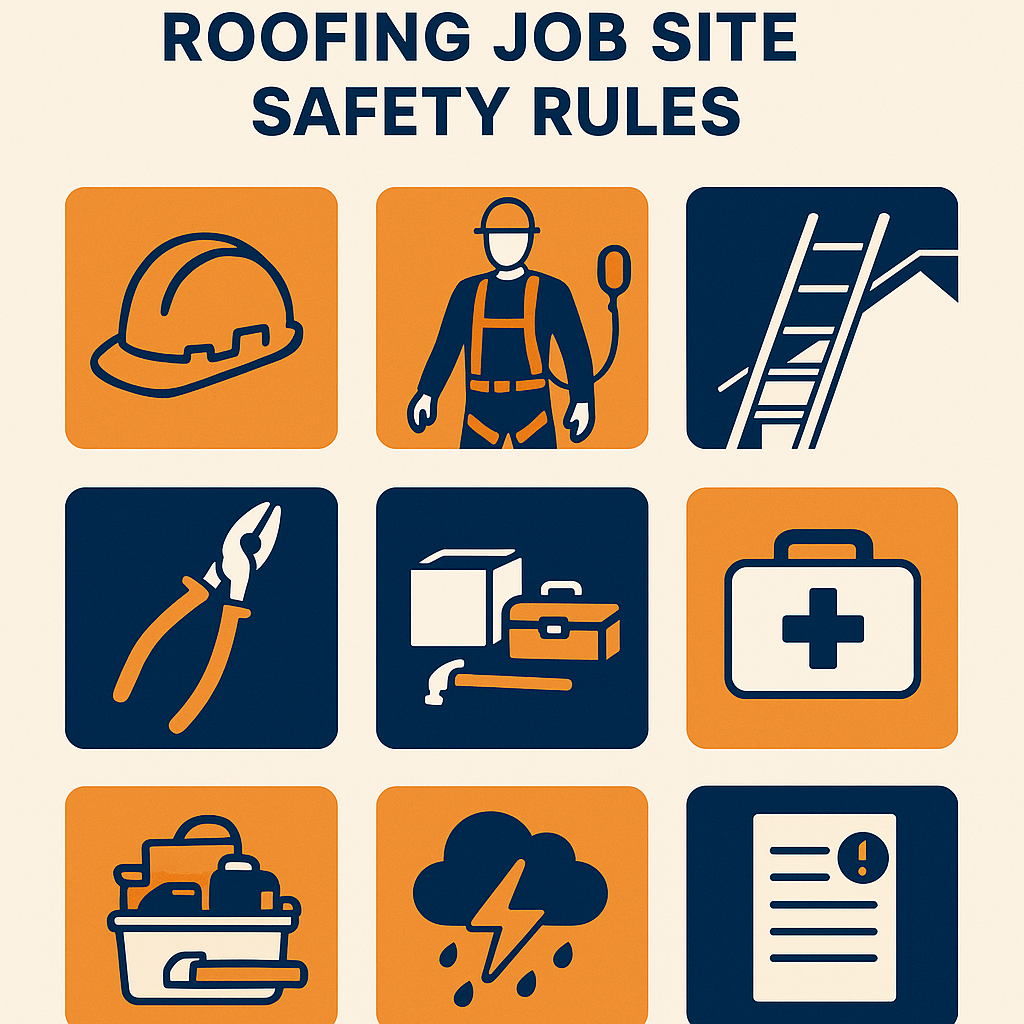
Site Standards & Professionalism
A clean, organized job site is the first indicator of quality craftsmanship. When a client sees a messy site, they assume the work underneath is equally careless.
Site professionalism extends beyond aesthetics. It directly impacts safety, efficiency, and client confidence. Every Z-Craft crew member is responsible for maintaining the site to our standard from first arrival to final cleanup.
Debris scattered across the property, materials disorganized with no clear staging area. Nails and scraps left on walkways and landscaping.
Materials stacked neatly in designated staging area, site swept throughout the day, dumpster placed properly with clear access path.
Tools left on the roof overnight, creating safety hazards and risking theft or weather damage to expensive equipment.
All tools secured and inventoried daily. Tool bags organized, power tools stored in locked vehicle or job box every evening without exception.
No protection for landscaping, flower beds, or hardscaping. Shingle debris and nails left embedded in grass and garden areas.
Drop cloths placed over landscaping before work begins. Magnetic nail sweeper run across entire property at end of every day.
A clean site is a safe site. If the site looks sloppy, the work probably is too.
Weather-Resistant Barriers
The weather-resistant barrier is your building's last line of defense against water infiltration. Get it wrong, and the consequences are hidden behind walls — until mold, rot, and structural damage reveal themselves months later.
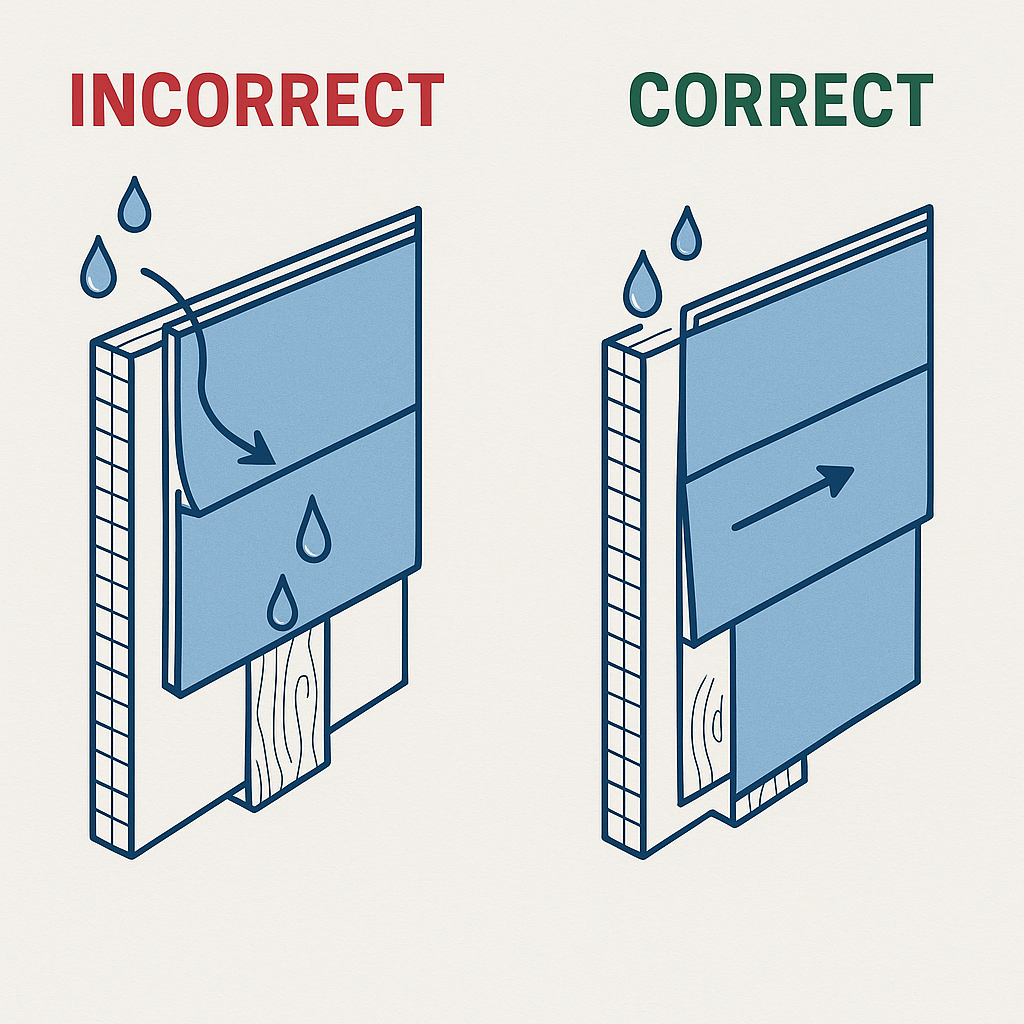
Proper WRB installation follows one fundamental principle: work with gravity, never against it. Every lap, every seam, every penetration must shed water downward and outward.
Top layer tucked under the bottom layer, creating a reverse lap. Water runs behind the barrier and into the wall cavity, causing hidden damage.
Bottom course slides under top course in a shingled pattern. Water sheds naturally across the surface without ever penetrating behind the barrier.
WRB torn at penetrations with no tape applied. Every hole in the membrane is an open invitation for water to enter the wall system.
All penetrations taped with manufacturer-approved flashing tape, pressed firmly with a J-roller to ensure full adhesion and watertight seal.
No integration with window openings. WRB simply cut flush at rough opening edge, leaving the most vulnerable area completely unprotected.
WRB properly lapped into the window rough opening with correct sequencing. Sill flashing installed before jamb wrapping for continuous protection.
Water always finds a way down. Your WRB layers must work WITH gravity, not against it.
Window & Door Flashing
Window and door flashing failures are the #1 source of water intrusion lawsuits in construction. The installation sequence is critical — there is NO shortcut.
Every step in the flashing sequence builds upon the previous one. Skip a step or reverse the order, and the entire system is compromised. This is precision work that must be done right the first time.
Sill pan missing entirely. Water that reaches the window rough opening has no drainage path and pools against the framing, causing rot.
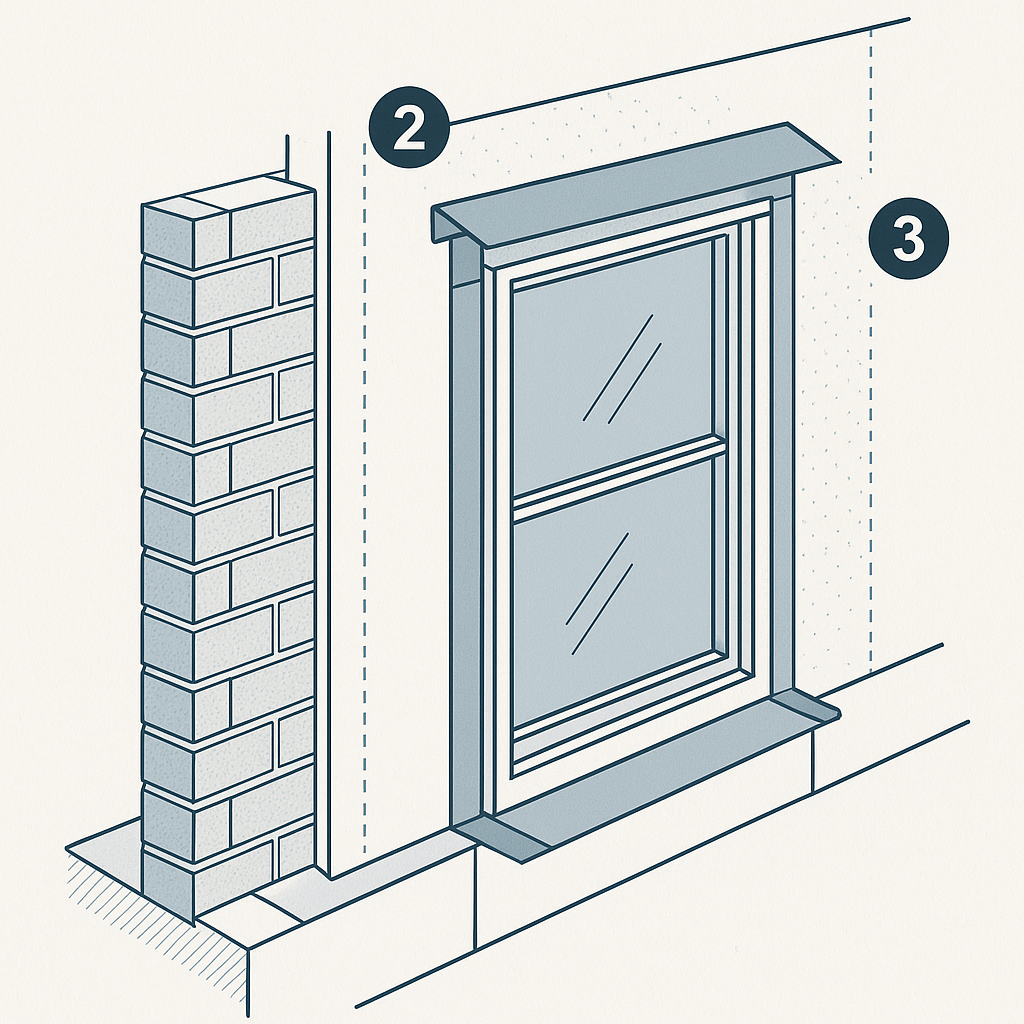
Sill pan installed first with a positive slope to the exterior. Back dam height exceeds sill height, preventing any water from reaching the framing.
Head flashing installed under the WRB, trapping water between the flashing and the barrier instead of directing it away from the window.
Head flashing properly integrated over the WRB with minimum 4" overlap. Water cascades over the flashing and down the face of the barrier.
No corner dam at sill. Water runs freely around the corner of the sill pan and behind the jamb flashing, completely bypassing the drainage system.
Corner dams prevent water from running behind jamb flashing. Each corner is sealed with a folded membrane dam that directs all water to the sill pan.
Flash the sill first, always. Work from the bottom up, just like the water flows down.
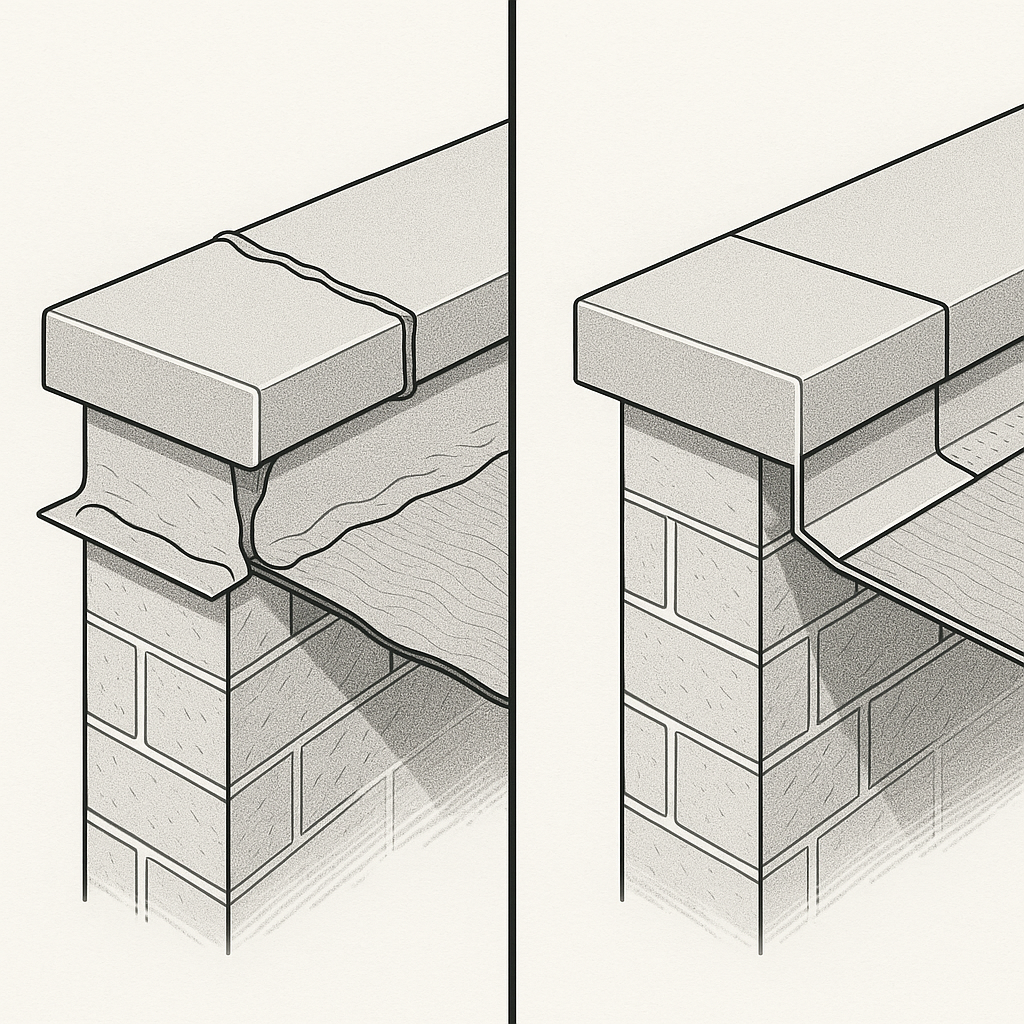
Coping Caps & Custom Metal
Coping caps are the most visible metalwork on any commercial building. Sloppy coping work is visible from the ground and tells every potential client that you don't care about the details.
Custom metal is where craftsmanship becomes art. The joints, the alignment, the finish — these details are what separate Z-Craft from every other contractor on the bid list.
Slopped caulk visible at joints, gaps between pieces allowing water penetration. Uneven alignment that's visible from ground level.
Clean joints with proper 4" overlap. Sealant applied neatly inside the joint, invisible from the exterior. Every piece aligned to a chalk line.
No drip edge installed. Water runs directly down the face of the building, causing staining, efflorescence, and accelerated facade deterioration.
Drip edge extends past the wall face by minimum 1". Water breaks cleanly from the metal edge, preventing any contact with the building facade below.
Wrong sealant used — incompatible with metal substrate. Sealant fails within months, cracking and pulling away from the joint.
Manufacturer-approved sealant only. Sealant type, color, and application method verified against spec sheet before any joint is sealed.
Coping caps are the crown of the building. If they look bad, everything below looks bad.
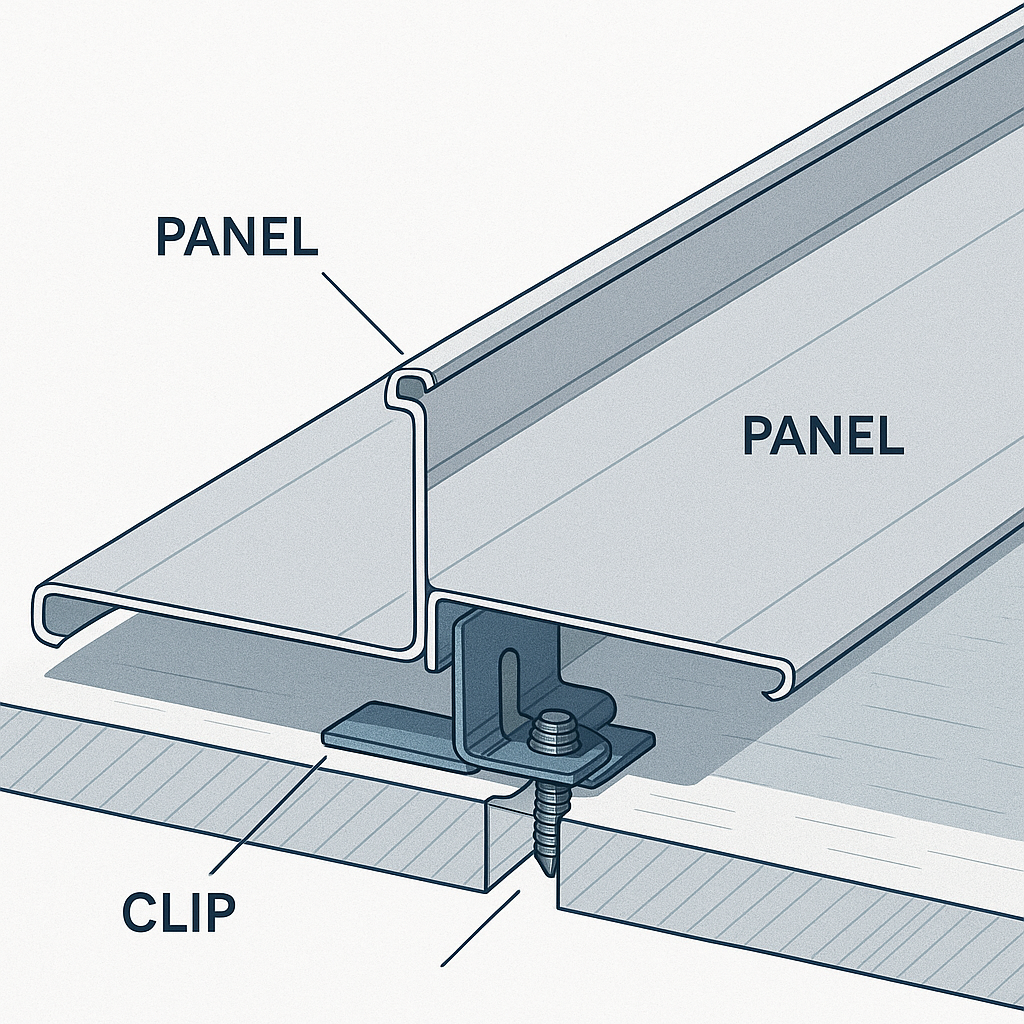
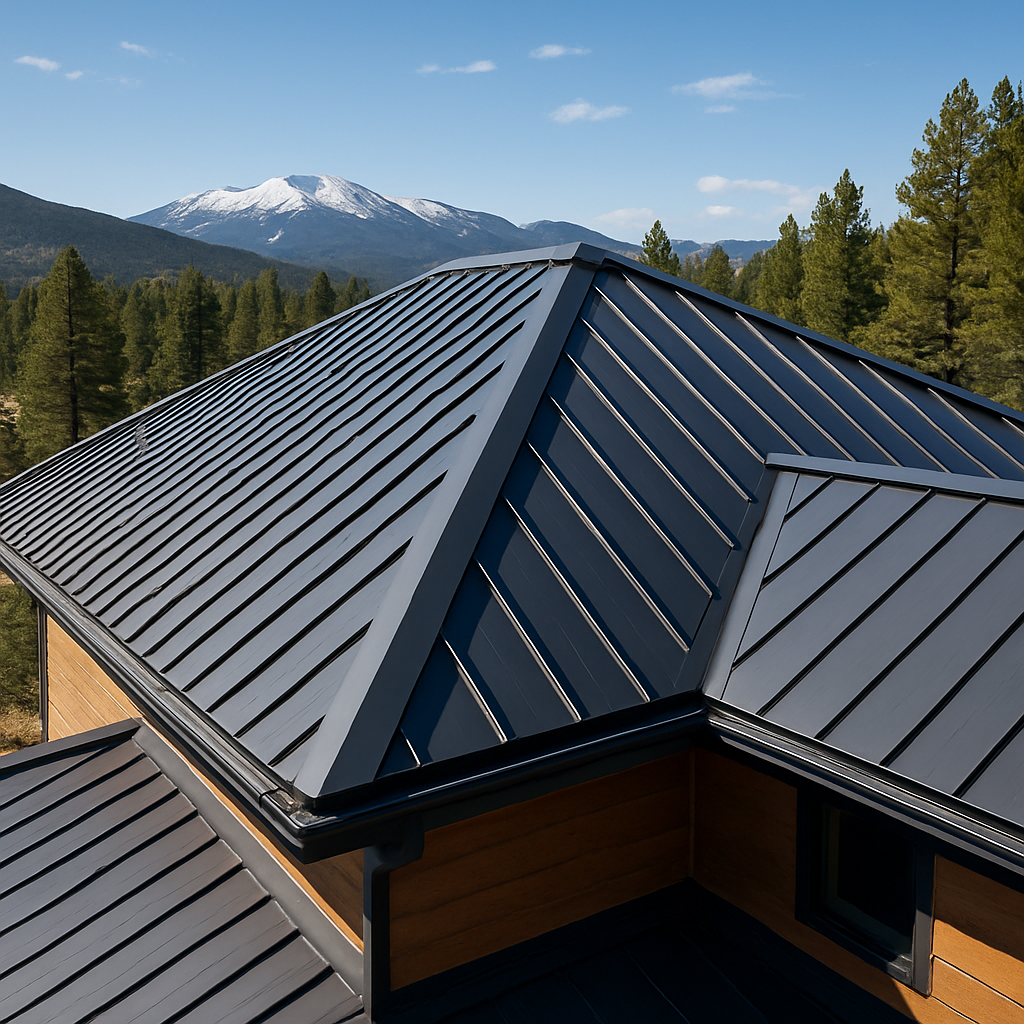
Standing Seam Installation
Standing seam metal roofing is Z-Craft's signature. This is precision work that separates professionals from amateurs. Every seam, every clip, every panel must be perfect.
A properly installed standing seam roof is a work of engineering excellence — clean lines, concealed fasteners, and a surface that performs flawlessly for decades. There is no room for "close enough."
Exposed screws used instead of concealed clips. Every visible fastener is a future leak point and a visual indicator of amateur installation.
Hidden clip system with manufacturer-specified spacing. Zero exposed fasteners on the roof field — clean, uninterrupted panel lines from ridge to eave.
No thermal expansion gaps accounted for. Oil canning visible across panel faces, creating an unprofessional wavy appearance in direct sunlight.
Proper expansion gaps calculated for panel length and temperature range. Straight, clean seams with no oil canning — even under harsh Colorado sun.
Misaligned panels at transitions and penetrations. Visible gaps, crooked cuts, and inconsistent reveals that destroy the clean aesthetic.
Factory-precision alignment at all transitions. Every cut measured twice, every panel checked with a straightedge. Transitions are seamless and watertight.
Standing seam is precision work. If you can see the fasteners, you did it wrong.
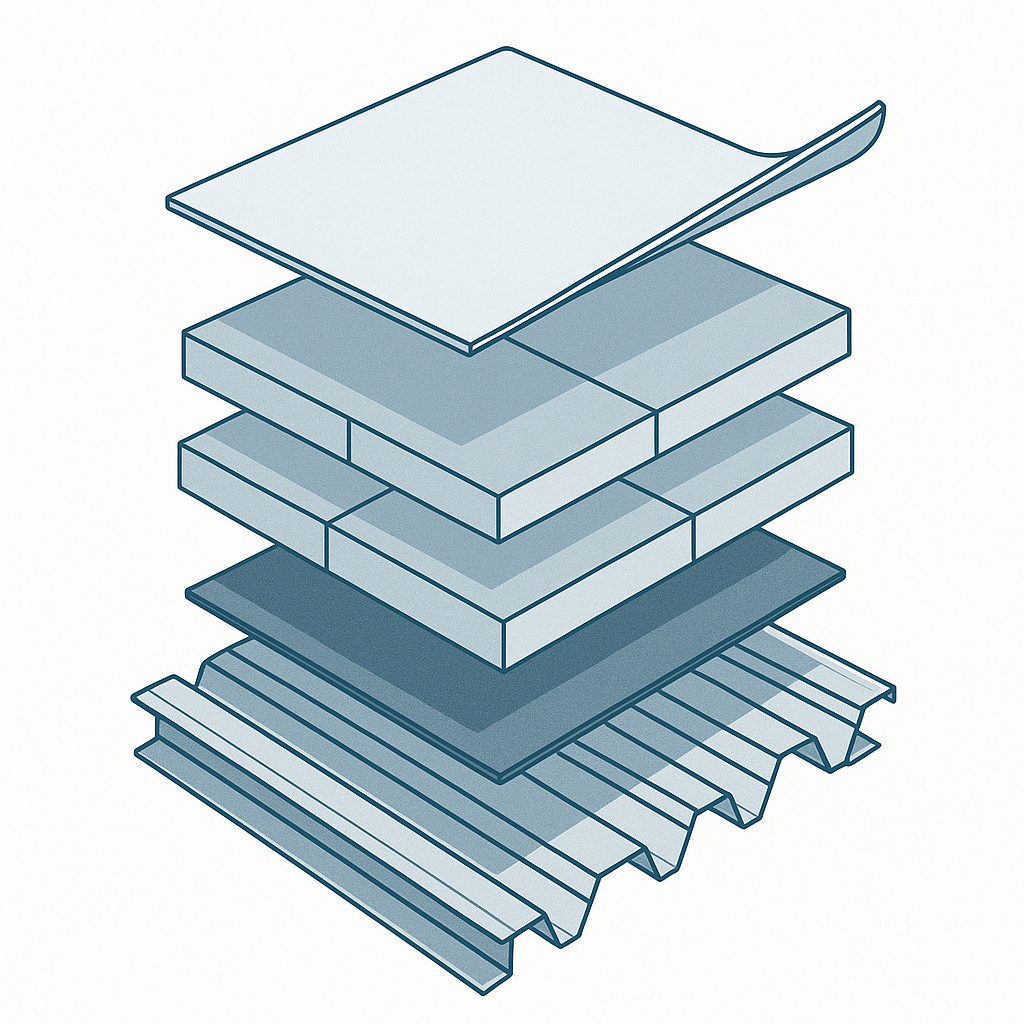
Flat Roof Assemblies
Commercial flat roofing has zero tolerance for error. A single compromised seam can lead to catastrophic water damage in a building worth millions.
Every layer in a flat roof assembly serves a specific purpose. From vapor barrier to membrane, the system works as an integrated whole. One weak link compromises the entire investment.
TPO seams not fully welded — cold welds or skipped sections create invisible failure points. Water wicks through the gap by capillary action.
Full hot-air welded seams with every seam probe tested after cooling. Weld width and temperature verified against manufacturer specifications.
Insulation boards aligned in a grid pattern, creating continuous joints that act as thermal bridges. Energy loss and condensation result.
Staggered two-layer insulation with offset joints. No continuous thermal bridge exists in any direction — maximum R-value achieved across the entire deck.
Drain not properly integrated into the membrane system. Water pools around the drain edge, eventually finding its way beneath the membrane.
Drain bowls recessed with clamping ring compressing the membrane. Sump area tapered for positive drainage — no ponding water within 48 hours of rain.
Flat roofs have zero tolerance for error. One bad seam and the whole system fails.

Fastener Patterns & Wind Ratings
Wind uplift is the #1 cause of roof failure in Colorado. The fastener pattern isn't a suggestion — it's engineered for the specific wind zone and verified by the building inspector.
Understanding the three zones of a roof (field, perimeter, corner) and their different fastener requirements is fundamental knowledge for every Z-Craft installer. Getting this wrong doesn't just void the warranty — it puts lives at risk.
Random fastener spacing with no regard for wind zone designation. Same pattern used at corners as in the field, leaving corners critically under-fastened.
Engineer-specified corner, perimeter, and field zones clearly marked on deck before installation. Each zone fastened to its calculated uplift requirement.
Wrong fastener length selected — fastener doesn't penetrate the deck sufficiently. Pullout resistance is a fraction of what's required.
Minimum 3/4" deck penetration verified on first fastener of every bundle. Fastener length calculated based on total assembly thickness plus required penetration.
No documentation of fastener pattern. When the inspector asks for verification, there's nothing to show — resulting in costly tearoff and reinstallation.
Fastener map documented and photographed before membrane installation. Zone boundaries, fastener type, spacing, and penetration depth all recorded.
The fastener pattern isn't a suggestion — it's engineered for the specific wind zone.
Final Inspection Checklist
Every Z-Craft job ends with a comprehensive inspection. We don't leave until we'd be proud to put our name on it.
This checklist is non-negotiable. Every item must be verified by the crew lead before the client walkthrough begins. No exceptions, no shortcuts, no "we'll come back for that."
- All flashing properly integrated and lapped
- No exposed fasteners on standing seam systems
- Coping cap joints overlap minimum 4 inches
- WRB layers lapped correctly (shingled pattern)
- All penetrations sealed per manufacturer spec
- Drip edges installed at all eaves and rakes
- Gutters cleared of debris
- Site cleaned — no nails, scraps, or materials
- Completion photos taken (minimum 20)
- Client walkthrough completed
- Sign-off form signed by client and crew lead
- Warranty documents provided to client
Don't leave until you'd be proud to put your name on it. Every job IS your resume.
“Quality is not an act, it is a habit.”— Aristotle
zcraftco.com